MANUFACTURERS


Key Processes
Every stage of our manufacturing process — detailed so you can understand its precision and impact.
Our Manufacturing Process
1. SMELTING & ROLLING
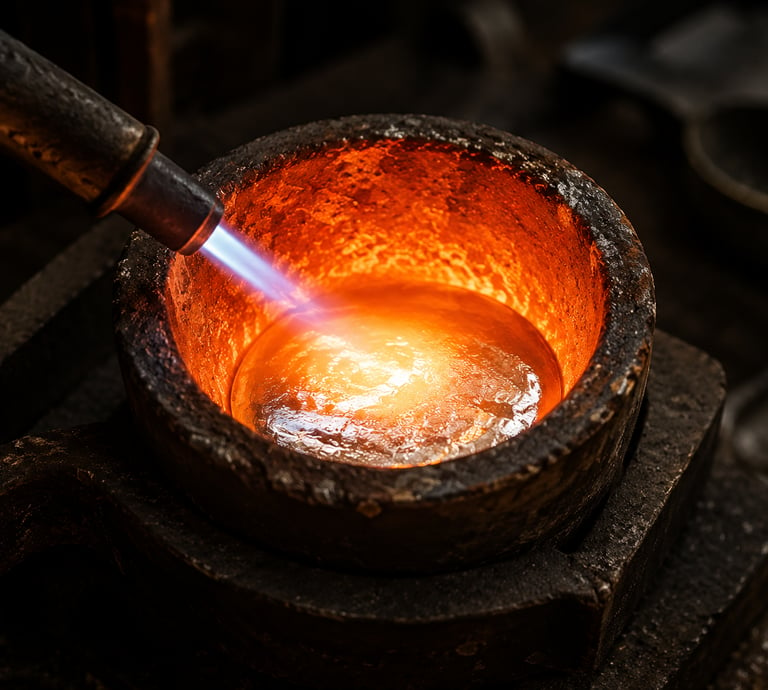
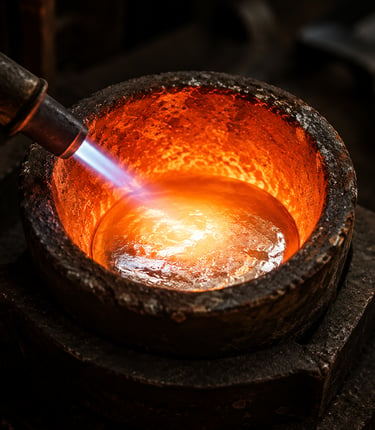
1.1 Smelting
We begin by creating a silver-copper alloy according to the desired purity:
925 Silver: 68g of copper + 925g of pure silver = 1kg of 925 silver. The remaining 7g are added via a bronze alloy during soldering.
950 Silver: 43g of copper + 950g of pure silver = 1kg of 950 silver. The remaining 7g are added via a bronze alloy during soldering.
Solder is also prepared by mixing silver with bronze in varying ratios depending on the desired quality. Standard solder is 50% silver and 50% bronze. Higher quality solder contains a greater proportion of silver.
Once the alloy is mixed, it is melted inside a crucible vessel and formed into silver bars.
1.2 Rolling
Using rolling machines, the silver bars are shaped into strips, wires, sheets, half-round profiles, and more. As the silver passes through the rotating rollers, it must be reheated — a process called annealing — to restore flexibility and prevent cracking, until the desired width and thickness is achieved.
"
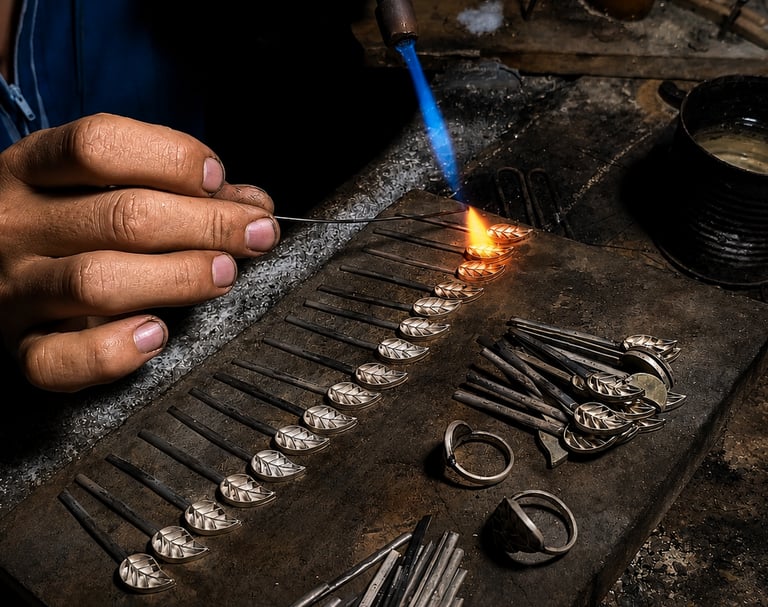
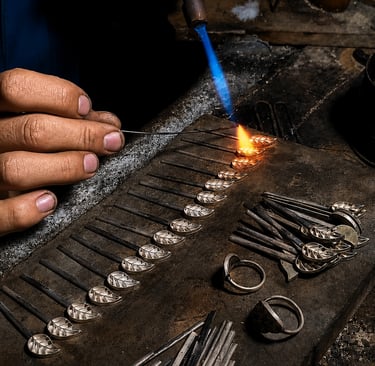
2. ASSEMBLY & SOLDERING
This stage marks the true beginning of jewelry fabrication, as the molds and structural forms are built here. Precision at this stage is critical — any flaw in the mold will affect every step that follows.
The process begins by cutting silver strips to the measurements and shapes required by each design. The pieces are formed using a variety of tools including pliers, tweezers, scissors, and squares.
For designs where the ends must join, those joints are soldered first to prevent deformation during the full assembly soldering.
To solder, gas torches are used. Before applying heat, the pieces are coated with borax dissolved in water, which allows the solder to flow evenly and quickly. The assembled mold is then heated and submerged in a water-and-acid solution until it is fully whitened and clean.
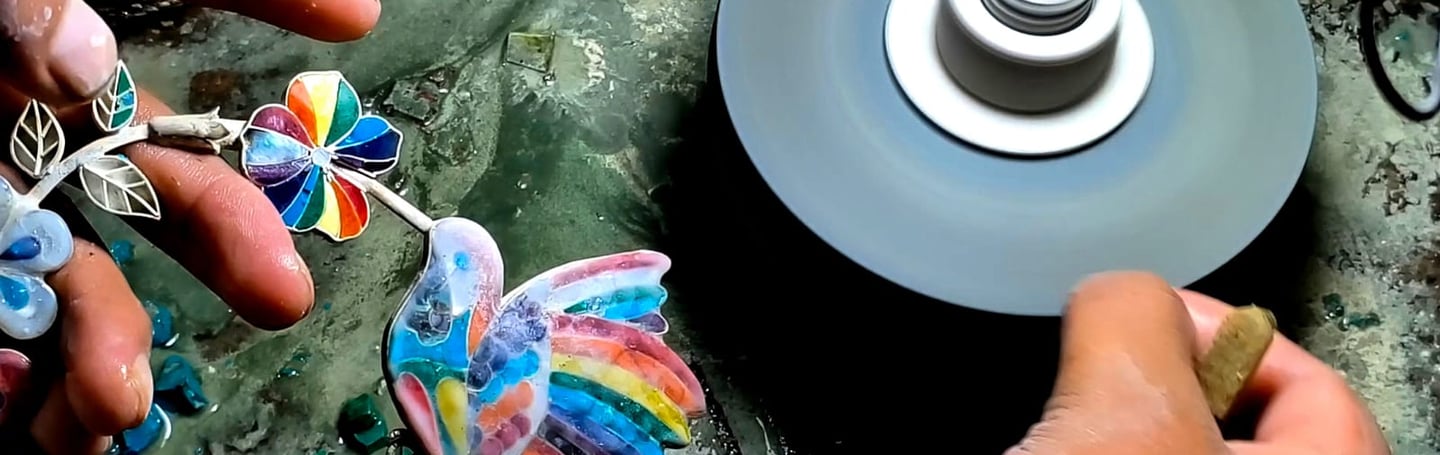
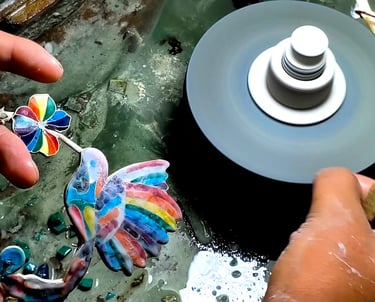
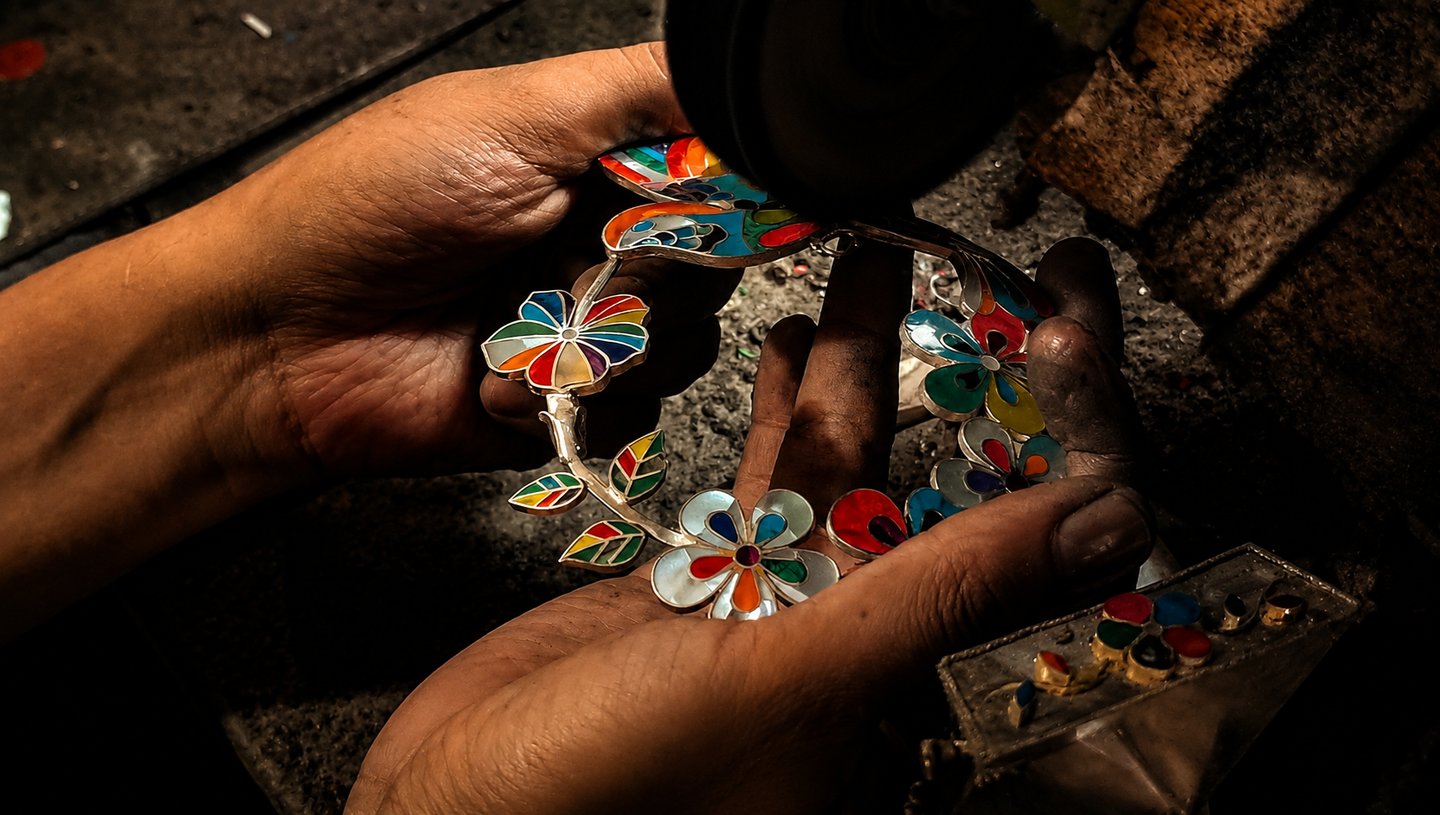
3. STONE CUTTING & INLAY
Before inlaying, each stone must be cut into thin slices using a bench motor fitted with a diamond stone-cutting disc.
Once all stone cuts are ready, the inlay process begins. This requires a workbench equipped with a motor and stone grinding wheel, used to shape each stone precisely to fit the design's contours. This process is one of the most critical in the entire workflow, as it determines the color combinations, the fit, and the overall quality of the piece. Every single stone is inlaid by hand — a method closely related to the ancient Inca stone-carving tradition — because the fit between stone and silver frame must be absolutely precise.
This is perhaps the most symbolic and defining process of the Huallpa style. It demands time, dedication, and deep concentration.
Stone inlaying — or lapidado — is an ancestral technique in which each stone is shaped to perfectly match the silver frame (caja) built by the assembler.
4. GLUING, SANDING & FINISHING
4.1 Gluing
Once the inlaid pieces are dry, they are bonded using a specialized adhesive: fiberglass resin mixed with monomer at 50/50, plus 2% cobalt. This base mixture is prepared once a month in large batches. For daily use, a catalyst is added drop by drop just before application. The mixture must be applied within the first 5 minutes and takes a minimum of 24 hours to fully cure.
4.2 Face Sanding (Stone Sanding)
This step levels the stones flush with the silver frame and bevels the edges, creating a smooth, even surface. The quality of this step directly determines the final brilliance of the stones during polishing. Using the same bench motor, the process begins with a stone grinding wheel, followed by wet sandpaper in grits 320, 600, and 1000. The sides of the pieces are also sanded using wet 220-grit sandpaper to refine cuts made during assembly.
4.3 Back Plate Sanding
The back of each piece is sanded using a bench motor fitted with wet 220-grit sandpaper to remove any imperfections left by the previous processes.
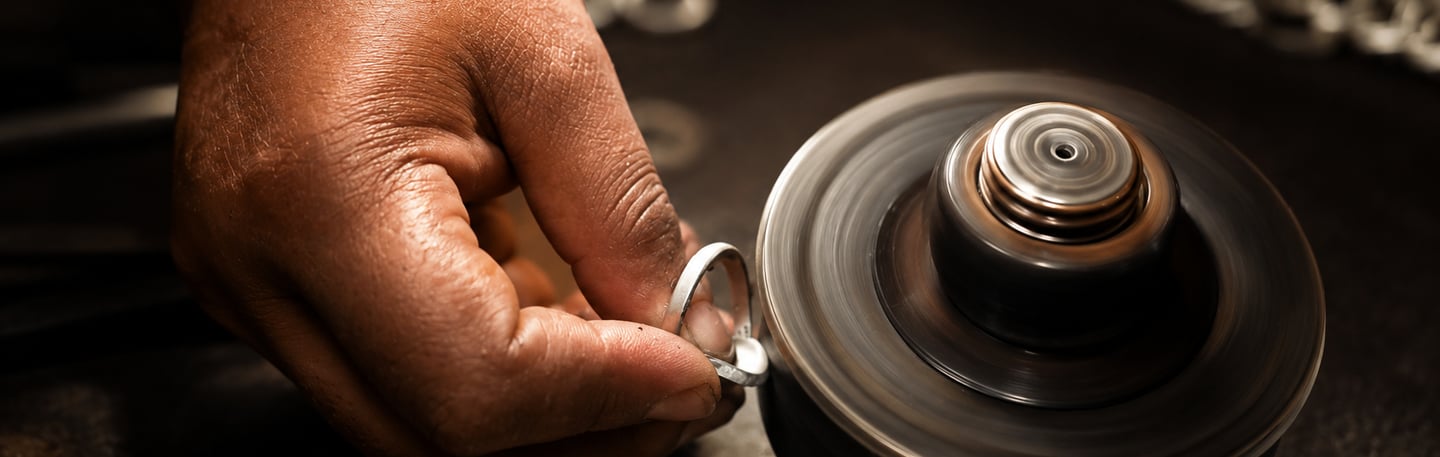
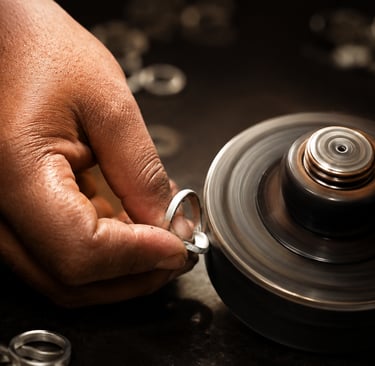
5. FINISHING
5.1 Brushing
Using a bench motor fitted with a circular black-bristle brush and red polishing paste, this step removes black stains and surface scratches from the silver. It is applied to the back and sides of each piece.
5.2 Polishing
This step achieves a higher level of smoothness and quality using a denim disc and red polishing paste, applied to the entire piece without exception.
5.3 First Wash
Immediately after polishing, each piece is scrubbed with a toothbrush in a solution of hot water and dish soap to remove polishing residue. Pieces are then rinsed in cold water and dried with a hair dryer.
5.4 Lustring
This is the step where the jewelry achieves its final high-gloss shine, using a white flannel disc and DIALUX sky-blue polishing compound. The quality of this step depends entirely on the quality of all previous steps — face sanding, brushing, and polishing must all be done correctly for the final shine to be achieved.
5.5 Second Wash
The same washing process as above is repeated, with extra care taken during the rinse to protect the finished surface.
5.6 Drying
Several drying techniques can be used — flannel cloth, tissue paper, or a hair dryer. At Huallpa, we use a specialized technique: the rinsed pieces are placed in a container filled with very fine sawdust and left for approximately 2 hours. The contents are stirred and left for 1 additional hour. The pieces are then removed and placed on clean paper.
5.7 Final Cleaning
A hair dryer is first used to ensure the pieces are completely dry and to remove any remaining sawdust. The pieces are then carefully wiped with tissue paper to ensure they are fully clean and dry before final inspection and packaging.

Explore our sleek website template for seamless navigation.
Contact
Newsletter
huallpajewelry18@email.com
+51 968 355 505
© 2018. All rights reserved.
Direct Links:
Catalogs
Downloadable Links:
How to Buy
Manufacturing Process